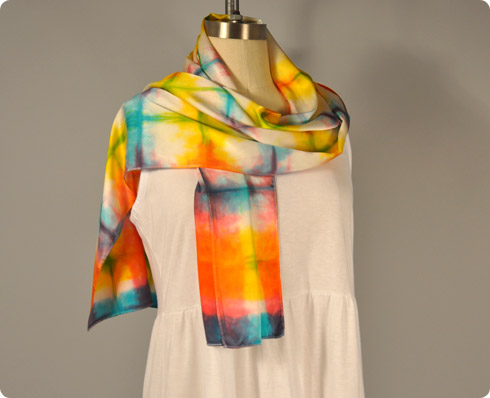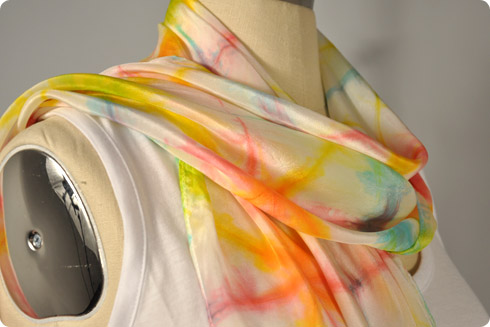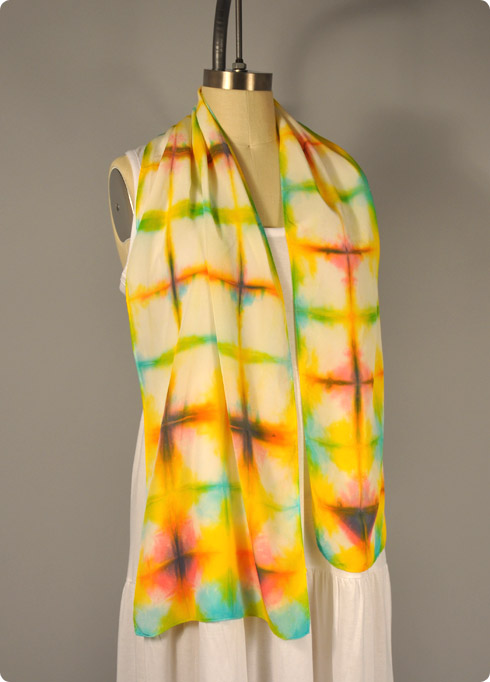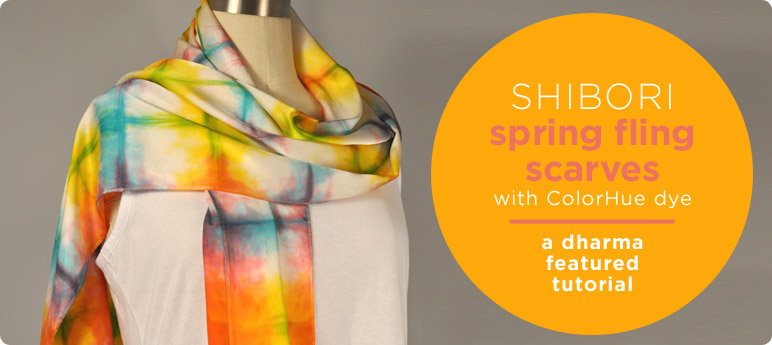
Super easy Mother's Day Shibori scarves! Using ColorHue and some simple Shibori techniques you can make some beautiful spring silk scarves without any steaming or simmering. A great project for the kids, and handmade is always the best gift for Mother's Day or any gift giving occasion really.
Shopping list:
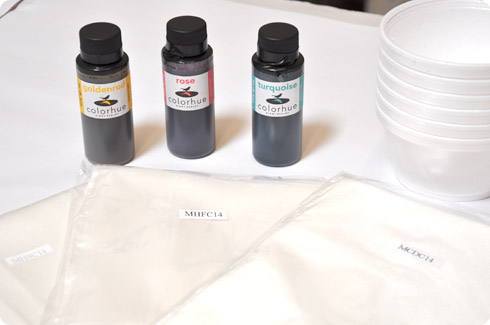
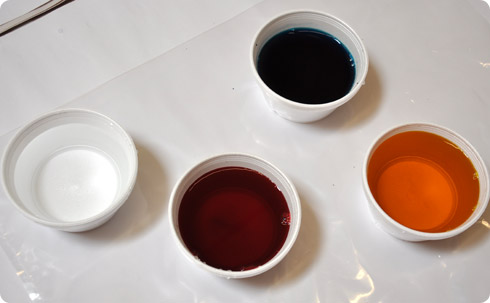
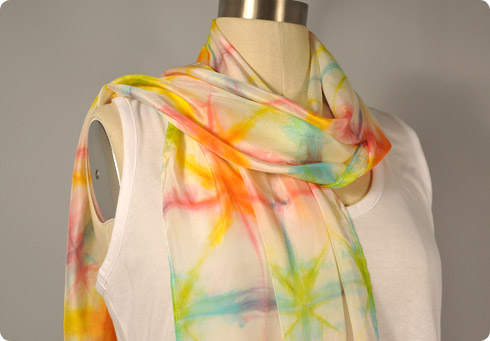
- Colorhue Instant Set Silk Dyes - we used #1 Rose, #2 Turquoise, #7 Goldenrod
- Silk Scarves
#MHCDC 15x60"
#MHFC 15x60"
#MHSC 15x16" - 3 small bowls or Tupperware type containers
- Dharma Professional Textile Detergent to pre-wash scarves in
- Warm water to dilute dyes and soak scarves in
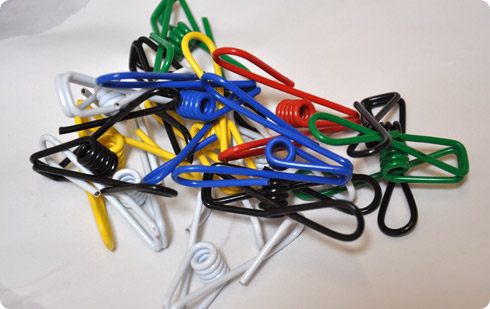
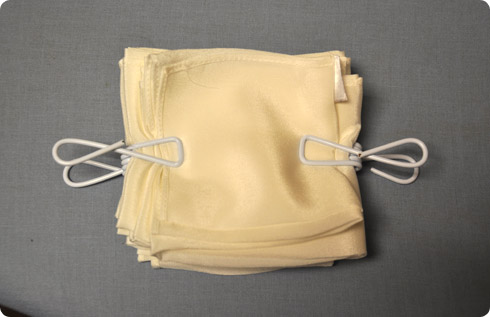
- Silk Clips
- Iron
Let's get started!
Pre-wash your scarves with some Dharma Professional Textile Detergent, then let them air dry until damp.
Note: Adults should help younger kids with folding/pleating with the iron or let kids fold the damp scarves without ironing, the folds will be less crisp but that is ok.
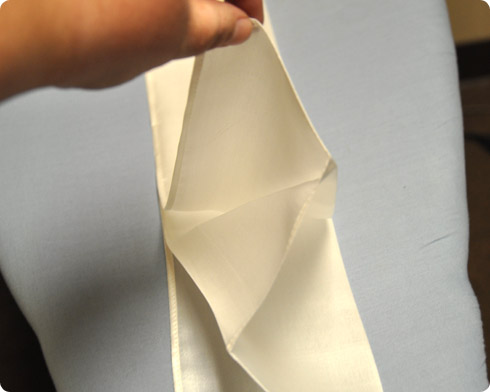
Folding your Scarf:
- Fold in half lengthwise and press gently with iron on medium setting
- Fold the facing edge of the scarf down to the center fold and press gently with iron
- Flip scarf over and fold the other edge down to the center fold and press
Pro-tip: you can adjust this first pleating step for smaller pleats for greater detail but know the more you pleat now the trickier it gets to keep things stacked nicely in the next step
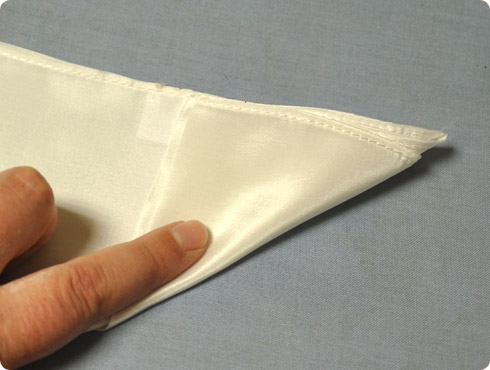
Next decide if you want to fold triangles or squares/rectangles:
Triangles:
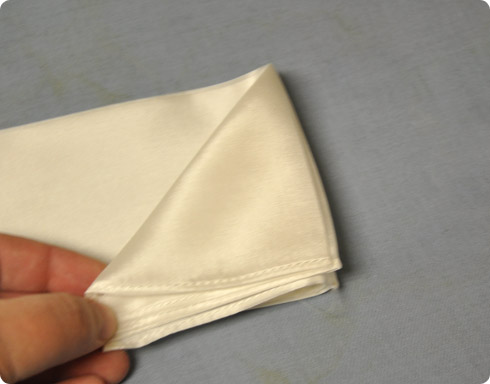
- starting at one end fold over the corner of the pleated scarf upwards to form a triangle. Press gently.
- Fold the triangle backwards along the straight edge and press gently
- Fold down the triangle along its long edge and press gently
- Keep folding back and forth like this along the length of the scarf, gently pressing with the iron after each fold
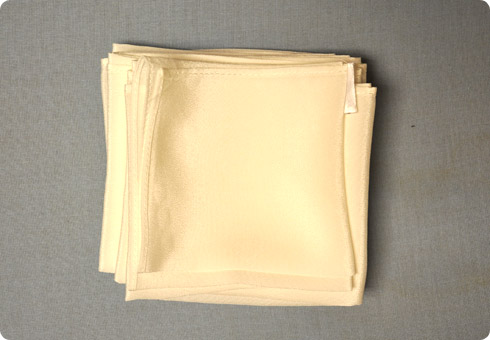
- Once the whole scarf is pleated up use a silk clip or two to help hold it all in place

Squares/rectangles:
- Starting at one end fold over the scarf end to form a square or pull it over a little more for a rectangle. Press gently.
- Fold the square/rectangle backwards along the straight edge and press gently
- Keep folding back and forth like this along the length of the scarf, gently pressing with the iron after each fold.
Note: When doing your folds you want to mimic an accordion, folding back and forth to alternate the edges, otherwise you will end up with a roll and have very different effects from your dyeing
Ok, now that the hard part is all done, it's time to add some color!
Put 1-2 teaspoons of dye to each bowl, then add about 1 cup warm water in each of your 3 bowls and mix well.
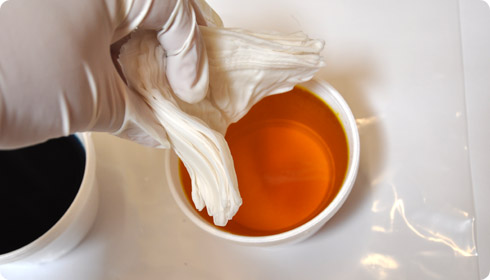
Grab the first scarf (we picked the triangle) and soak it for a few moments in the warm water to set out the scarf, squeeze out the excess water and double check that your pleats as are tidy as you want them. Take off the silk clips, the damp silk will hold together from here on out.
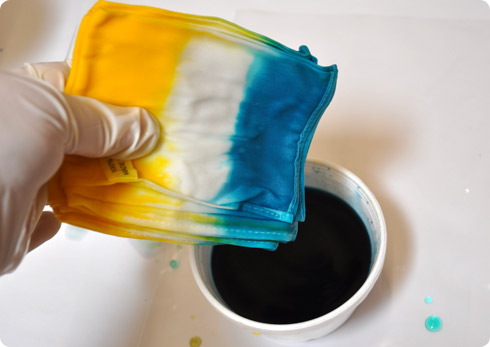
Starting with the yellow, dip an edge or a corner of your scarf into the bowl, hold it in the dye for just a few seconds.
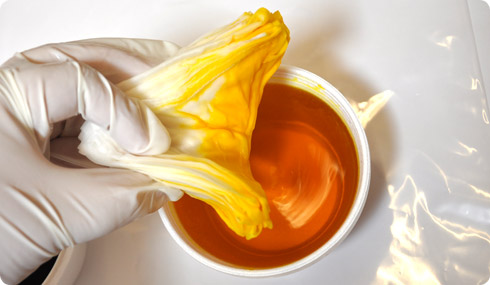
Lift it out and then turn it to the next corner or edge you want to dye red (rose). Dip the edge/corner and hold it for a few seconds.
Dip the last edge in the blue (turqoise), hold it for a few seconds and pull it out. Set your scarf aside to dry. Grab your next scarf a go through the process again.
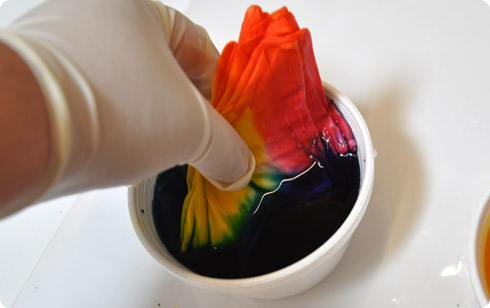
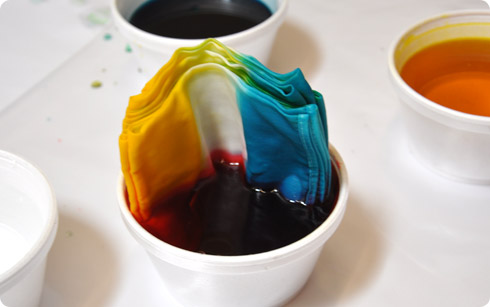
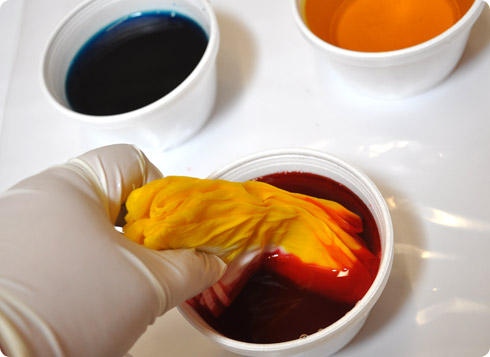
You can get all kinds of fun variations, try dipping a corner in yellow and then in just the tip in blue, you will get a little point of green. If you want the color to get into the folds carefully open the edge up in the dye and swish while you clamp the rest together with your other hand, how deep you dip the open edges will affect how much white is left in the center of your folds.
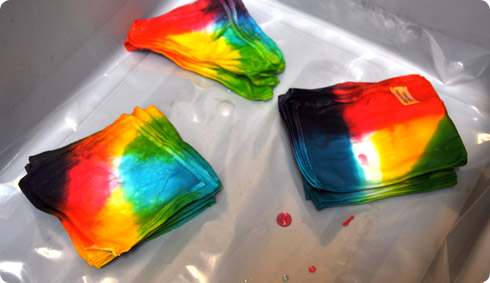
Colorhue fixes instantly, so you do not need to do anything else to set the color except let it dry. We kept our scarves folded over a weekend, and while they had not fully dried, we did a quick rinse in some cool water and then put them in the dryer on low. If you want you can do a rinse with some Milsoft fabric softener before drying them.
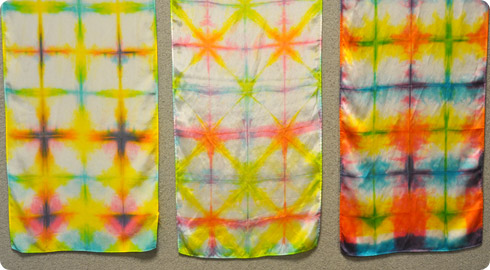
Now your scarves are ready to wear or give as gifts. Or maybe you had so much fun you need to make more!