


It's summer break. Have the kids said "I'm bored" yet? Get kids' (ages 5+) creative juices flowing with this engaging art project that lets them print bright, geometric patterns on tee shirts.
My daughter's kindergarten teachers and I devised the project to enhance students' pattern/math skills. First, we let them play with sponge patterns using tempera paint on paper. After a couple of tries, they were warmed up and ready to print with permanent paint on fabric.

Step 1: Cut sponge shapes: Use a pencil to trace simple geometric shapes (circle, diamonds, squares, triangles) onto sponges. Shapes should be about 1" to 1.5" in width or diameter. Avoid tiny or complex shapes with intricate edges. Adults or older kids can cut shapes out with sharp scissors. All kids should have a chance to drop the compressed sponge shapes into water -- they'll get a kick out of watching them magically expand.
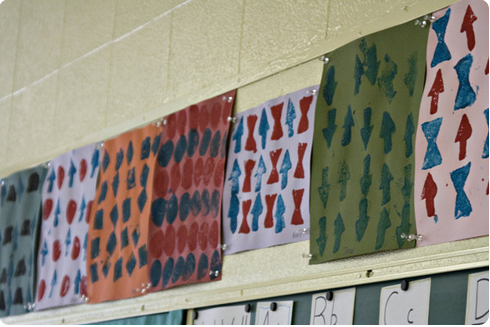
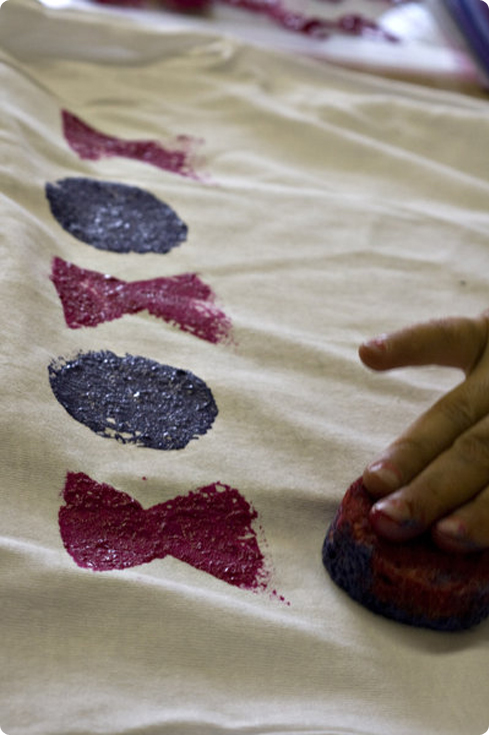
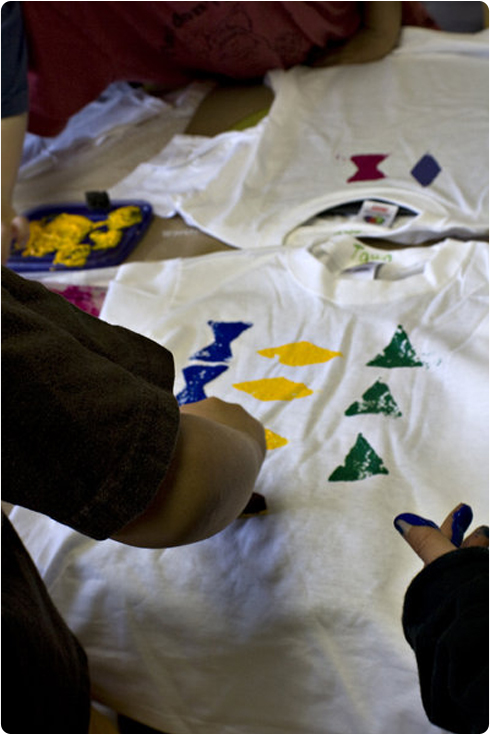
Step 2: Plan patterns: Create patterns (AB, ABC AABB, ABCA) using alternating shapes, colors, or a combination thereof. Show kids how to place one or two clean fingers between each shape as they move from left to right and up and down to ensure even vertical and horizontal spacing.
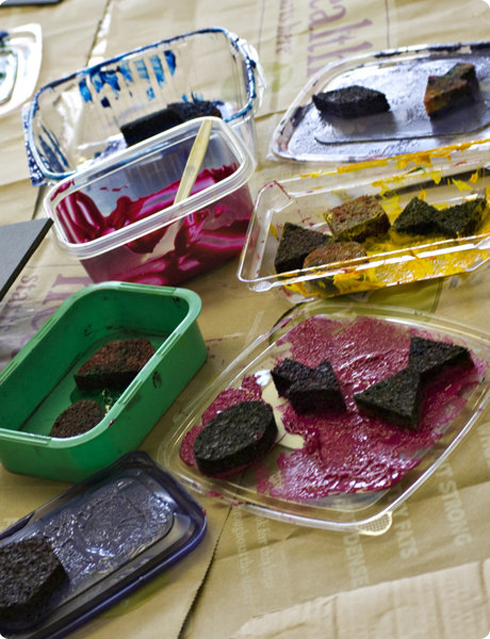
Step 3: Prepare fabric paints: Mix fabric paints to desired color, adding a little water so that the consistency is that of slightly runny pudding. I found the out-of-the-jar colors too "acid" for my taste and mixed more subtle purples, yellows and light blues.
Part 2: Printing
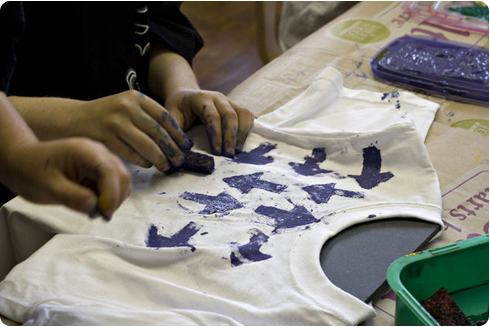
Prep the Work Area: Clear a wide, flat table and cover with newsprint or grocery bags. Work near a utility sink or keep a bucket of water handy for rinsing sponges or paint-covered hands. Lay out plastic lids and spoon 2 tablespoons of paint onto them. Wring wet sponges until just damp and place 2-3 sponges on each paint tray. Tell kids that each sponge shape must stay with its original color to prevent unwanted mixing. Finally, lay clean cotton tee shirts with printable area side up. Insert cardboard rectangles inside the tees to prevent ink from bleeding through to other side.
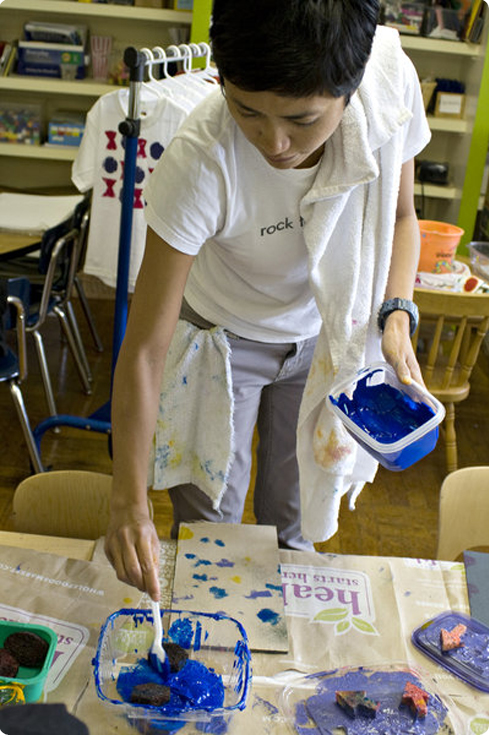
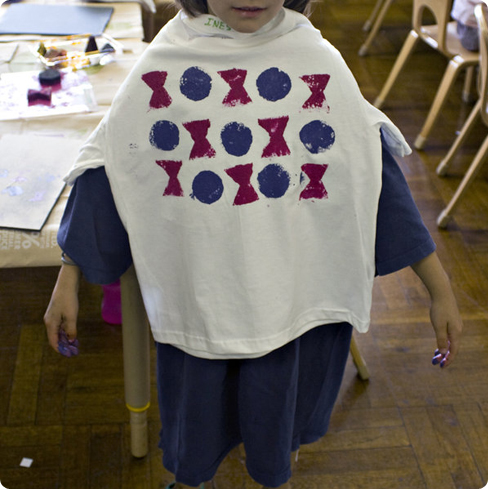
Print! Dip sponges into paint, blotting or scraping off excess paint. Beginning in the top left-hand corner of the shirt, place the first shape down and lift off. If paint is too faint, re-dip and re-position sponge, then tap the sponge in areas where the paint didn't transfer.
Keep old rags nearby so kids can wipe their fingers to avoid splotching and fingerprinting. Mistakes are inevitable; this is an opportunity to make beauty out of them!
Allow paint to dry (overnight is best) on a rack or hanger. If kids want to print on the back side or sleeves, repeat steps 4 ff. and allow to dry overnight again. Follow fabric paint label instructions and heat set with a very hot iron. Wash inside out. Wear and enjoy, or present as gifts.
TIPS
• Use no more than 3 colors and 3 shapes maximum.
• Ask children to repeat their pattern aloud (AB, ABC, ABCA, etc.) as sometimes they get lost in the process and lose their way.
• Some children prefer to print up and down rather than left to right.
• Use this same process on dyeable tote bags, table runners, flags, banners, etc., all available at Dharma Trading Co.
Shopping list:
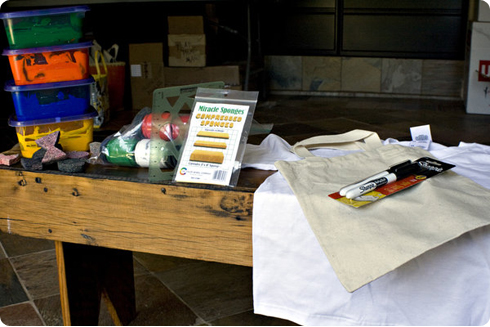
I ordered fabric ink, compressed sponges and ready-to-dye tees from Dharma Trading Co., a fantastic, affordable online resource for teachers and parents who want to do any kind of fabric painting.
Compressed Sponges (regular sponges are ok, but compressed are easier to cut)
Pencil
Fabric paint (non-toxic, water-based such as Versatex)
Old shirts & rags
Recycled plastic container lids
Plastic spoons
Newspaper or brown grocery bags
Recycled cardboard rectangles (approx. 8" x 10")
Bucket of Water
Photo Credit: Roxanne Davis


