This is our own Fiber Reactive Dye tie dye kit which we assemble for you. It's a good way to get started with tie-dye as it has everything you need, including instructions for various ways to use the dyes. What you're NOT paying for is fancy packaging. What you ARE getting is fresh vibrant professional quality dye and great value. It's not a bad idea to add a few more colors if you like and maybe a book like 'Tie-Dye' to expand your design options. It's great fun, and a good way to spend a day with some kids or friends. This item also makes a great gift for your crafty friend or family member!
You will also need white shirts or clothing to dye, so you should check out our great pricing here!
Kit contains:
- three 8 oz. squeeze bottles
- #1 Lemon Yellow 1 oz.
- #13 Fuchsia 1 oz.
- #25 Turquoise 1oz.
- 1 lb. Soda Ash fixative
- 1 lb. Urea
- 4 oz. Detergent
- 50 rubber bands
- one pair latex gloves - Large
- 1 dust mask
- Complete instructions
Extra things you may need:
- Large tables (card tables or picnic tables work)
- Plastic tarps to cover tables
- Bucket for the soda ash solution (plastic is best - 5 gallon is a nice size)
- Old newspapers (at least 6-8 weeks old-so the ink doesn't come off) to absorb the excess dye under the clothing being tie-dyed
- Bowls of water to rinse gloved fingers between colors
- Measuring cup - 2 cups or larger-clear pyrex works great -to initially dissolve the dyes in
- Measuring Spoons and spoons for stirring the dyes
- Funnel - to pour premixed dye solution into squirt bottles
- Paper towels and/or sponges to wipe up messes!
- Garbage can or bags for trash
Featured Customer CommentFantastic!!!!! Bought this for a Sweet 16 birthday party for my daughter (her request). They made some fantastic looking shirts. Went to school the next Monday and got rave reviews and ORDERS. She is now planning her next T-shirt making party. |
Made in: UNITED STATES (USA)
Tie Dye Group Instructions
INTRODUCTION
The Soda Soak Tie-Dye Method is the way to do this. Our recipes, abbreviated group instructions, and a lot of patterns using this method are in the new book, "Tie-dye" (#BTD), which we include in our larger (50/100 shirt) Tie Dye Group Kits.
Basically, you follow the Soda Soak Tie-Dye instructions (also shown below) en-mass. In a nutshell, what you do is fold and tie up the shirts (or whatever), soak them in a solution of soda ash and water for a few minutes, apply a solution of dye, water and urea, let them sit overnight in plastic bags, rinse them, untie them, rinse them some more, and wash them in a washing machine with Dharma Dyer's Detergent and hot water. Thats it! Easy!
The Dharma group kits have all the basics except the clothing, which we carry at very reasonable prices. Dharma white clothing is 100% cotton and tie-dyes beautifully. If having the thread of the garment also dye is important to you, watch for the little cotton plant icon on the clothing ad - if you don't see that icon, it is sewn with Polyester thread, which stays white. If you get your clothing elsewhere, make sure it's not a polyester blend! You'll get a very washed out look.
Other things you may need:
- Large tables (card tables or picnic tables work)
- Plastic tarps to cover tables
- Buckets for the soda ash solution (plastic is best - 5 gallon is a nice size)
- Old newspapers (at least 6-8 weeks old-so the ink doesn't come off) to absorb the excess dye under the clothing being tie-dyed
- Bowls of water to rinse gloved fingers between colors
- Measuring cups - 2 cups or larger-clear pyrex works great
- Measuring Spoons and spoons for stirring the dyes
- Big jugs with TIGHT fitting lids to hold large amounts of pre-mixed dye if you have a really large group
- Funnel - to pour premixed dye solution into squirt bottles as folks use it up
- Paper towels and/or sponges to wipe up messes!
- Big garbage can or bags for trash
Optional things:
- More rubber bands if doing complicated ties
- More gloves if more than 12 people dyeing at once
- More squeeze bottles if have lots of stations to set up
- Aprons, especially with young children - or at least have them wear old clothes
- Zip-lock plastic bags - if the students are going to take the clothing home to do the rinse out and wash (give them xerox of rinsing instructions - this is the easiest way to go for the instructors!)-otherwise, completed items can just be covered with plastic to stay damp overnight.
- Plumber's tape from the hardware store. Cheap and a perfect fix if any of your squeeze bottles leak, which can sometimes happen because they are inexpensive and mechanically mass produced and there is no way for us to practically test them for you. Just take a couple of wraps around the threads and you won't have to worry. Plumber's tape is a tie-dyer's friend!
PREPARATION (before the session starts):
It is best to have the tables all set up, covered with plastic, etc. Ideal to set up a table for about 5 to 10 folks to work at once. Each work area should have newspapers, rubber bands, gloves, finger rinsing bowl, paper towels or a sponge, zip-lock baggies for the finished tie dyes if you are using them, and squirt bottles of premixed dye in the selected colors - at least 1 bottle of each color, which can be refilled from jugs of pre-mixed dye as needed when you have lots of folks. It is always best to use freshly made up dye, so you can mix it the morning of the class, or the night before at most. This allows for the brightest possible color. Set up "fixer stations" with buckets of premixed soda ash for soaking the tied shirts before applying the dye. Allow about a gallon of soda ash mix for each 8-10 adult t-shirts - 1 lb of soda ash makes about 2 gallons.
To figure out how much dye solution you will need, figure approximately 4 oz. of liquid mixed dye solution will completely dye one wet adult t-shirt. So 50 adult t-shirts would take 200 oz of dye mix. Divide the total ounces you need by how many colors you are using to determine how many oz. of each color you need to mix. Our recipe is for 8 oz, so use that and multiply it like a cookie recipe to get to the required amount. On a really big scale, you might need a calculator, but for example, 500 adult t-shirts would take 2000 oz, which works out to 15.625 gallons of dye (round up to 16 to be safe). For each gallon of dye mixture, instead of tediously measuring teaspoons, use about 1/2 cup of dye per gallon of water and 1 cup of Urea. 1/2 cup is very roughly 4 oz dry dye by weight, but every color has a different density, so yeild will vary. And of course, double to quadruple the dye for colors with 1 * or 2** by their name. For pastels use less. Also, it never hurts to make extra as everyone applies dye with a different flair. If your design will have more white, then of course, you will use correspondingly less dye. If you are doing little kids shirts, 4 oz might dye 2 or 3, and if you are doing large dresses, well, you get our drift. Don't forget to use a dust mask when mixing all powders!
An example:
Tie-dyeing 50 t-shirts in 3 colors, using 4 "stations" with 12 to 13 students taking turns at each station:
- Soda ash soak: 4 buckets, 2 1/2 gallons each, will take 5 lbs
- Dye: 3 colors in 16 oz squeeze bottles will tie-dye 12-13 shirts at each station, unless people really pour on the dye - for 4 stations, you would then need 12 bottles (kit has 6 - need 6 more)
ACTUAL PROJECT:
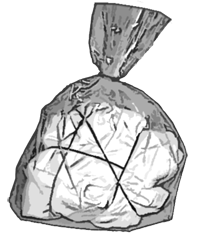
You can demonstrate tyeing to the whole group first, showing them how to tie their garments - then have folks do it at their station while it is fresh in their memory. Then all the shirts (or the first round, if folks are in line and taking turns) can be soaked at the soda ash stations 5-10 min. (Use heavy gloves to get the clothing out of the buckets, and gently press out the extra soda ash solution so they are not all drippy going back to the tables) While the shirts are soaking you can demonstrate how to apply the dye on a pre-tied and soaked garment. Be sure and demonstrate how to get the dye into the folds! Then turn 'em loose! Have them put their tied, soda soaked garments on some newspaper so it soaks up the excess while they are applying the dye. After garments are dyed, lay them all out on newspaper with plastic over the top to keep them damp for the curing process, making sure that shirts don't touch each other, or have each student put their garment in a zip-lock plastic bag. Then, have the students help clean up!
Caution! The soda ash solution is mildly caustic - it can irritate your skin.Wear gloves and eye protection. Rinse off at once to avoid eye and skin irritation.
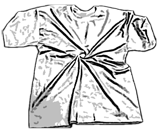
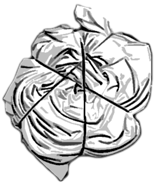
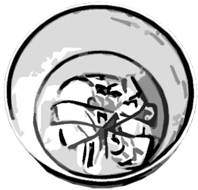
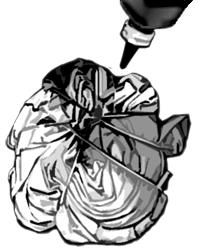
Dye Formula:
- 8 oz. cup of warm water
(not hot, body temperature) - 2 to 8 teaspoons of Procion dye
the Procion dye page
(Colors with no * = 2 teaspoons)
(One * = 4 teaspoons)
(Two ** = 8 teaspoons)
- 1 tablespoon Urea
(dissolve in hot water first). - 1/4 teaspoon water softener
(if needed) - Sodium Alginate Thickener
(A little to slow spreading, and control color, if desired.)
VARIATIONS & HELPFUL HINTS
- Dye shirt a solid color first using Tub Dyeing Method, then tie-dye using above method.
- After step 4, untie and re-tie in contrasting pattern.
- After tie-dyeing item, re-tie and use Discharge paste to bleach out a contrasting pattern.
- Sprinkle pure Procion powder onto tied and pre-soaked item for different effect (super intense color. Use a salt shaker with lots of salt and some dye for a lighter application)
- Put a small amount of Sodium Alginate thickener into dye mixture (step 3) to slow down the rate that the dye spreads and to create sharper edges.
- In step 4 any method keeping the fabric wet is OK, needn't be a plastic bag - cover many with plastic drop cloth, wrap in plastic wrap, etc. The warmer the temperature where you lay out your tie-dyes to cure, the quicker the chemical reaction.
- Use Water Softener if you suspect you have "hard" water.
- DON'T USE HOT WATER. The dyes work best in warm water (105 degrees) except #25, which can be used slightly warmer. #250 does like hot water and doesn't do well for tie-dye.
- Urea helps dye to dissolve, so dissolve the Urea in water first. Add this water to the dye powder gradually and paste it up to avoid lumps. Undisolved dye makes "explosions" of color or "freckles", so if a color is difficult to dissolve, straining through some light fabric might be necessary. Coffee filters only work if the dye is really liquid. Otherwise, they filter out too much of the dye.
- If you have trouble making a paste of the colors, a little Calsolene Oil can help because it breaks the surface tension.
- Squirt bottles are mechanically mass produced and once in awhile we get some that leak. A couple of wraps of that very inexpensive (~.60¢) thin white stretchy plumber's tape, that is available at any hardware store, around the threads solves this problem perfectly. No tie-dyer should be without it!
- Cover your work surfaces with old newspapers or folded paper towels to absorb extra dye. Wear old clothes! After applying dye to one side, flip garment over and repeat the process. Inject the tip of the squeeze bottle into the folds for best dye penetration and less white on the final product.
- With this dye, there is always lots of "excess dye" to be washed out. Don't crowd your washing machine with too much tie-dye or the water gets too muddy and so will your tie-dyes. Delicate items like rayon and silk are better hand washed or should go into a mesh bag on a gentle cycle so the agitation doesn't shred them.
- Planning a tie-dye party? We can make it easier with our Group Tie-Dye Instructions.
QUICK EXPLANATION
OF THE CHEMICAL PROCESSES INVOLVED IN TIE-DYEING
Fiber reactive dyes attach permanently to cellulose fibers using a covalent (electron-sharing) bond. These molecules carry a "chromophore" which absorb varying spectrums of the light, allowing only certain spectrums to reflect.
Covalent bonding is the one of the most basic and strongest types of chemical reactions. This reaction happens gradually over time depending on temperature and/or the Ph level of the surrounding environment.
The Soda Ash pre-soak raises the pH level of the garment or fabric to approximately 10.5. Raising the pH level of the solution that the fabric or garment is soaked in raises the level of negative hydrogen ions in the dyeing environment. The chemical bonding process uses these ions in the reaction. Pre-soaking in Soda Ash fixer solution is what allows the fiber reactive dyes to work at room temperature.
The reaction can also be aided with heat. Some tie-dyers have had success with using baking soda and microwaving their dyed articles. Since baking soda is a weaker alkali than Soda Ash, it must be accompanied by heat. Some people who are "chemically sensitive" choose to use this method.
The dye is allowed to react in a desirable host environment for up to 24 hours. After this time, the bonding sites on the cellulose should be saturated with dye molecules. Excess dye molecules that have not bonded permanently are washed away using warm water rinse and a dye-carrying detergent like Dharma Dyer's Detergent.
RINSING and INITIAL WASH:
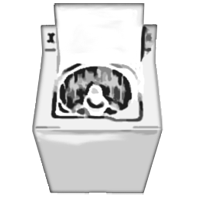
This is one of the most important steps to avoid "muddy" tie-dyes. Use gloves! While garment is still tied it needs to be rinsed as much as possible under cold running water (faucet, hose, shower, bathtub), then gradually untied while still rinsing. Get as much dye out as possible this way, then immediately wash with HOT water and Dharma Dyer's Detergent. Dharma's Dyer's Detergent is a special detergent that helps get the rest of the excess dye out so it won't bleed and run in future washings. Students could bring little jars to take some home in - warning-it can eat through plastic baggies. Remember, good rinsing procedure keeps the clothes from looking "muddy" and colors from running over each other into white areas. You can't skimp on water! Immediate washing with Dyer's Detergent keeps the excess dye that is still left from bleeding onto other colors. Before washing, don't let the dyed clothing touch anything!
CARE:
Since procion dyes are "fiber reactive", they are very permanent and will not fade or bleed. Bleach or detergents containing bleach should not be used! If the garments have been properly rinsed and washed, they are safe to throw in with the family laundry!


