


Marbling is the process of floating fabric paints on the surface of a thick cellulose solution (called "size"), somewhat like oil on water. The floating paints are swirled into patterns. Then you capture your design by laying a treated piece of fabric or paper down on top of the paint to transfer the swirls to the fabric. It is that easy!
When most crafters think of marbling they think of the fancy end papers in old books. But there is so much more you can do with marbling and all you need to get started is a desire to play! Now, Jacquard has come up with a revolutionary new Marbling paint that takes all the pain out of marbling!
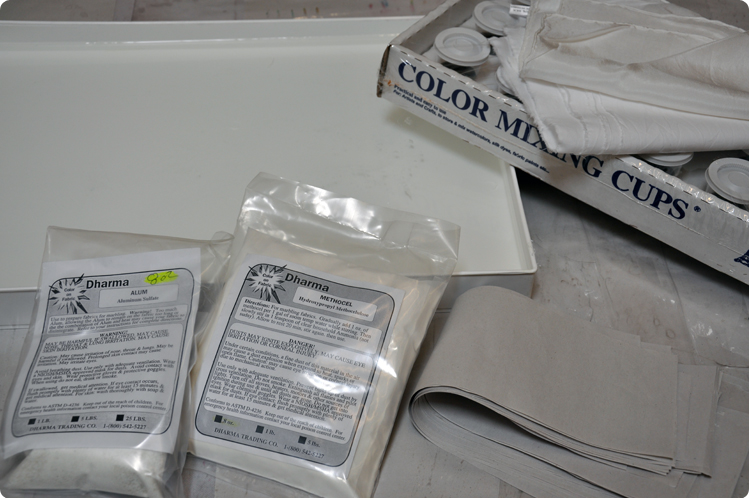
Shopping list:
- Fabric, scarves, ties or other items to marble - We used SH (silk hankies) and MCCB (mercerized combed cotton broadcloth); bandanas, cotton hankies and even t-shirts can be marbled, not to mention scarves!
- Alum
- Size: Methocel or Carrageenan (best)
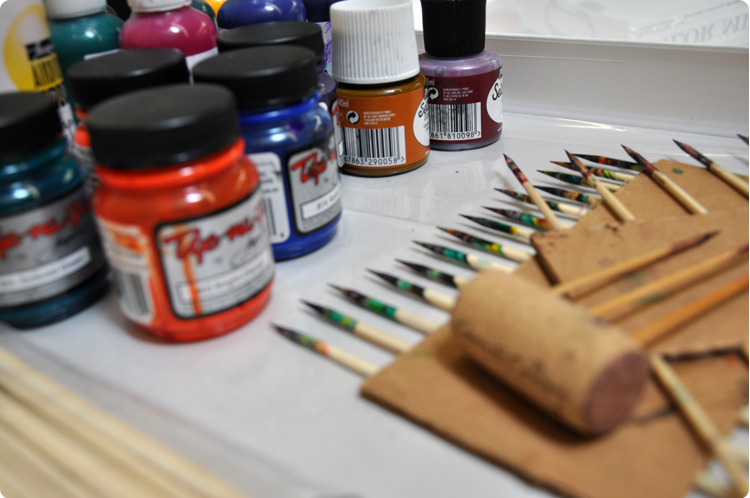
- Waterbased Paints: the NEW Jacquard Marbling Colors are the very best, but any of the following can be used: JMC2, DNF, SETA, JABI, SETT and SETOP, LN
- Cake pan or acrylic paint palette
- Rakes, combs, implements for pulling the paint:
- Make your own with cardboard and bamboo skewers (like we did)
- Wide tooth hair combs
- Tooth picks
- T-pins and foam board strips
- Wine corks with toothpicks
- Just about anything: experiment and play! - Newspaper strips or paper towels
- Dharma Dyer's Detergent
- Synthetic Gall
- Eye Droppers
Let's get started!
Prep Work
Most of the work in marbling is getting set up, but once you are all set up you can play for hours!

Making a frame
If you are working with fabric or clothing larger than your available pans, it's easy to build a pan using some 1" x 4" wood. Nail together a frame without top or bottom and just line it with some heavy plastic. You can make the frame any size you need. See this tutorial!
Pro-Tip: Another great option is to get plexi glass cut to size and to glue it together with Lumiere 3D paint to make a custom sized tray
How much size do I need?
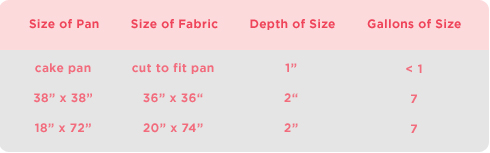
Note: Remember you'll have to change out the size periodically. Carrageenan goes "bad" faster than Methocel. Keeping it in a jug in the fridge (clearly marked!) will help it keep longer. Bad sizing smells bad, or gets moldy, or gets runnier.
Preparing the "size"
The first thing you need to do is to make the size onto which you are going to float the fabric paints.
Carrageen (Blender type): make 24 hours before it is going to be used.
We recommend this one, especially for beginners. It is more expensive, but is the easiest medium to float paint on. Use 4 teaspoons per gallon of warm water, slowly add to the water through top hole in blender lid. Blend until it's fully dissolved, make as many batches as you need to fill your tray or frame.
Refrigerate for 24 hours to obtain the best viscosity and to allow trapped air bubbles to rise to the surface.
Before use it needs to be warmed to room temperature.
Methocel: can be made 30 min before use
Some professionals use this to make their sizing, as it is less expensive, and keeps longer, especially when the weather is hot and humid. Takes some practice.
Use 1 ounce (4 tablespoons) of Methocel and 1 TBSP of ammonia per gallon of warm water
In a bucket, add ammonia to the water and then slowly add Methocel, stirring constantly with a whisk or large spoon.
Pro-tip: Don't use the blender or it will foam up and have to sit over night, ask us how we know!
Stir until the Methocel is dissolved and appears clear, let sit for 30 min for bubbles to rise.
How thick the "size" needs to be will vary with the brand of paint being used and the effects you like best. Testing is good!
Fill your pan or frame with the size, and just before adding the paints, skim off any film that has formed on the surface of the "size" by dragging a strip of newspaper from one end to the other.
Hard water: If the water in your area is "hard" (contains lots of minerals) you will need to add some of our Water Softener. Hard water will interfere with the process.
Reusing the size
The "size" can be used over and over again. It can be kept for 3 to 4 days at room temperature before it begins to mold and must be discarded. To keep it longer, refrigerate. (Mark and tape the container clearly so it is not eaten.) Warm it to room temperature before using. If the "size" has been sitting awhile, clear the surface of tension and dust with strips of newspaper before using.
Preparing the fabric
Pre-wash the fabric with detergent or regular fabric detergent and dry. This will wash out anything that is likely to prevent the paint from sticking.
For Fabric: 2 teaspoons Alum per gallon of water
For Paper: 2 teaspoons Alum in one quart water
Dip the fabric into the alum solution or if necessary, such as for paper, sponge it on very thoroughly. Lay it out flat to air dry, stretched if possible to avoid wrinkles. The fabric must be treated and must be dry before it is marbled. It is best to use the treated pieces within 24 hours. If you can't, then wash out the alum and try again another time. Careful! Too much Alum or too long of exposure weakens the fabric! Weakened fabric can shred when pulled on or even during sewing and washing, and sometimes doesn't become obvious until it has been washed more than once.
Caution - Ironing the fabric to remove wrinkles once the fabric has been treated is not recommended, as alum plus heat can weaken the fabric too, or even scorch. Small wrinkles will not effect the print.
Now Let's Get Started!
Floating the paints
This used to be the hardest part! Within every recommended brand of paint, every color used to be different, and some, you could never get to float, others simply spread too much. The revolutionary NEW Jacquard Marbling Colors have solved this problem!!! Developed specifically for marbling, they all float the same (except the black spreads a bit more than the others, as it is often the first color used), and for this reason, are completely intermixable to get an endless palette.
With other paints, you may need to thin them some before they will float. Use a few drops of Synthetic Gall and a little water to thin them to the consistency of whole milk in a paper cup or one of the Color Mixing Cups. With the Jacquard Marbling Colors, just use the Synthetic Gall if you want one of the colors to spread more than the others for some design purposes.
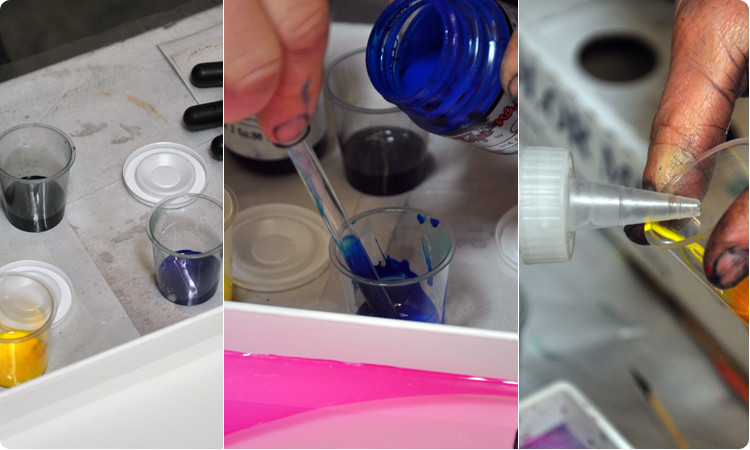
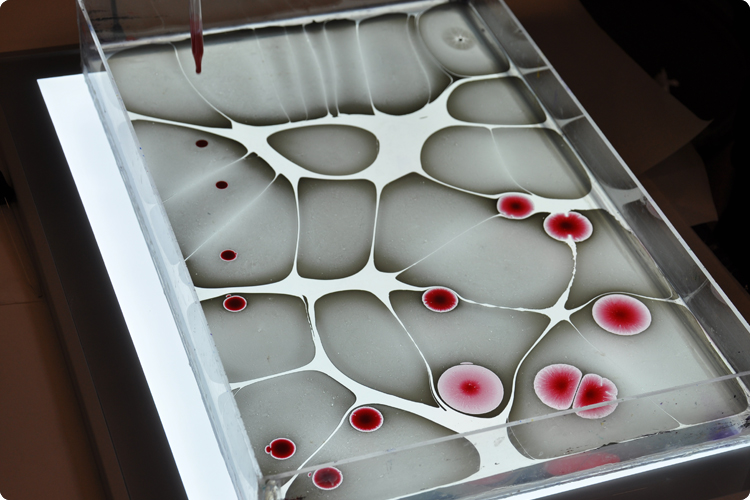
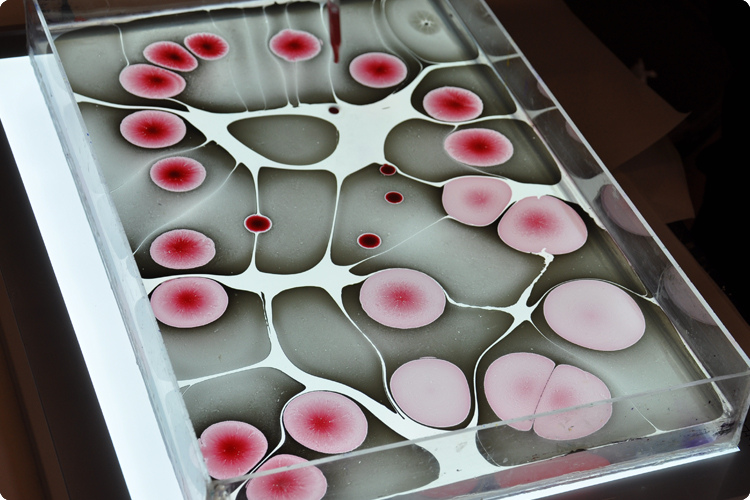
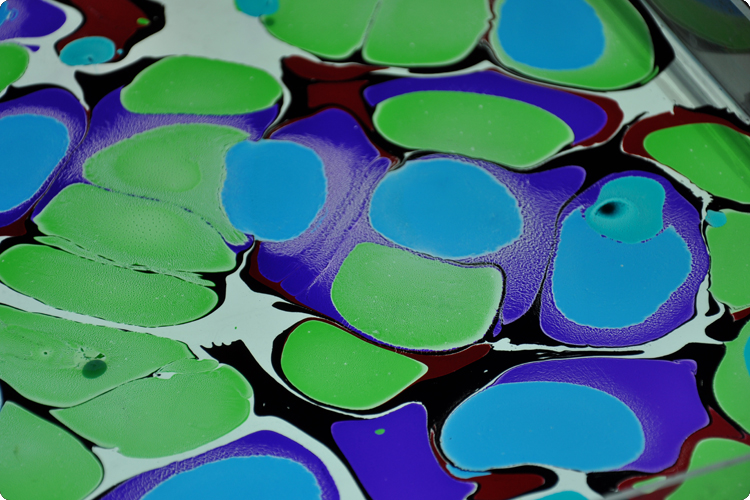
With an eye dropper, lay the paint on the surface of the "size" as gently as possible. The drop should spread out to a circle 2-3"; in size. As the paint spreads out on the surface some may sink to the bottom - it's ok as long as most of it stays on the surface. If too much seems to be sinking, thin the paint a bit more. If the drop spreads out too far, thicken the paint by adding a bit from the bottle. Keep adding paint to the surface until they seem intense or you are happy with the proportion of the colors.
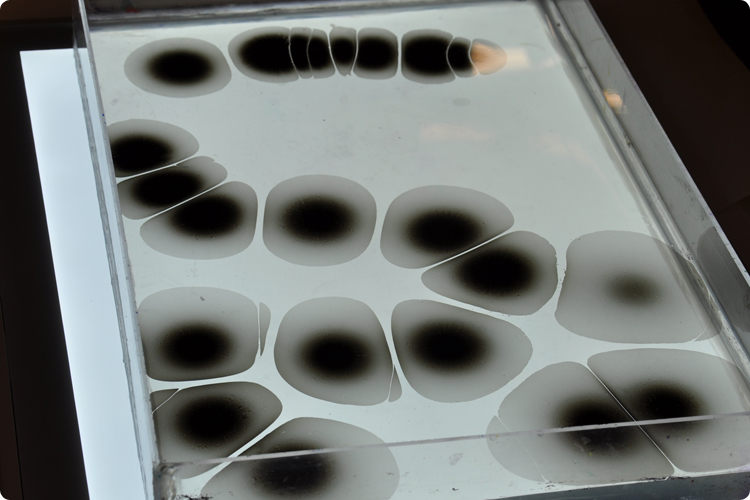
The order in which you drop the paints directly affects the look of the finished piece. As you add new colors, the ones added previously will intensify as they are pushed together. You can add new colors next to, or on top of, the ones already there. If you are working with anything other than the Jacquard Marbling Colors, some paints will spread faster and push others out of the way more, you should keep notes if you want to repeat effects. The colors don't mix, but rather stay separate. You can remove the paint and start over by laying newspaper on the surface to pick up all the paint from the surface. Paper towel can be used also.
Pro-tip: Making a small side frame of size for testing your paint consistency can help you get clear how your paints will act before 'going for it'!
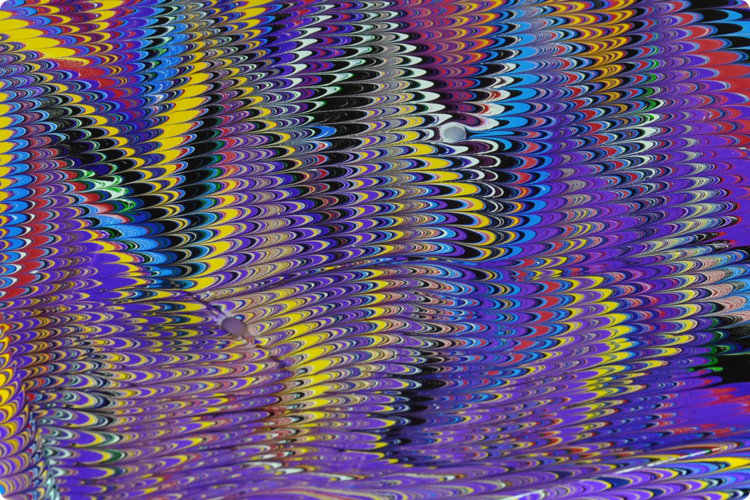
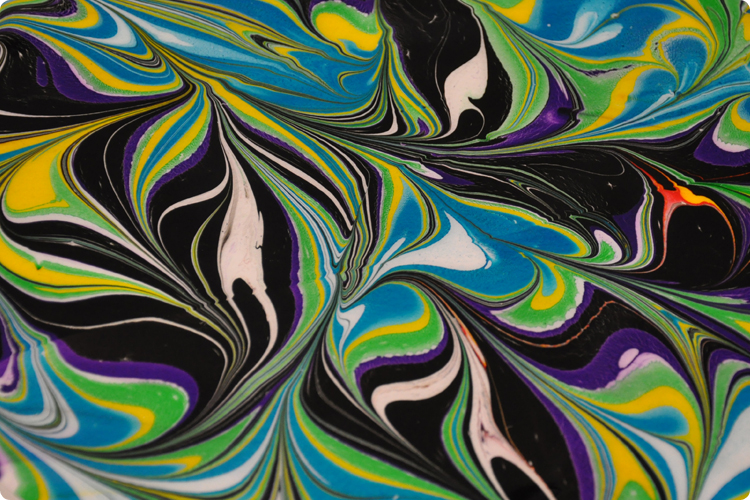
Making the designs
Anything goes when it comes to making your designs, in fact that's a main part of the fun.
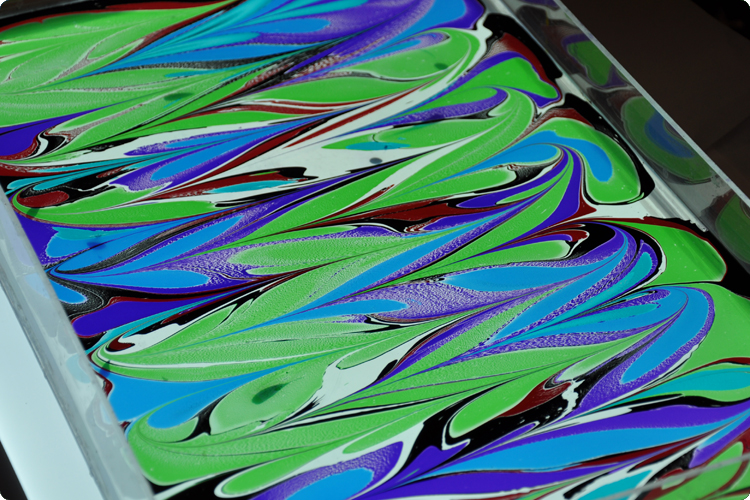
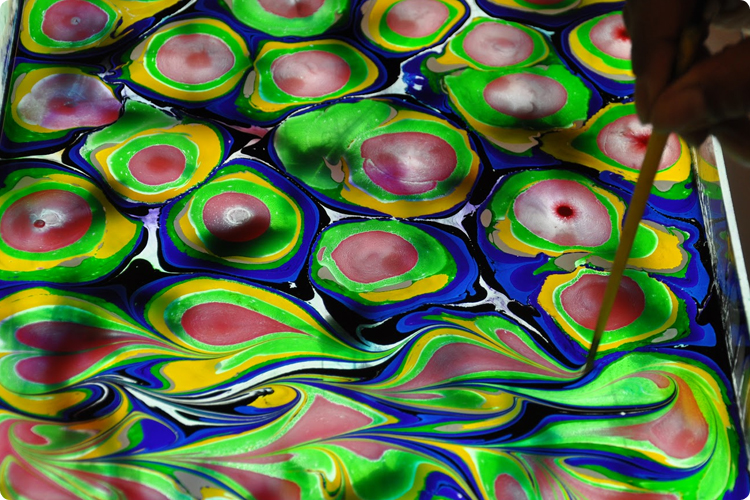
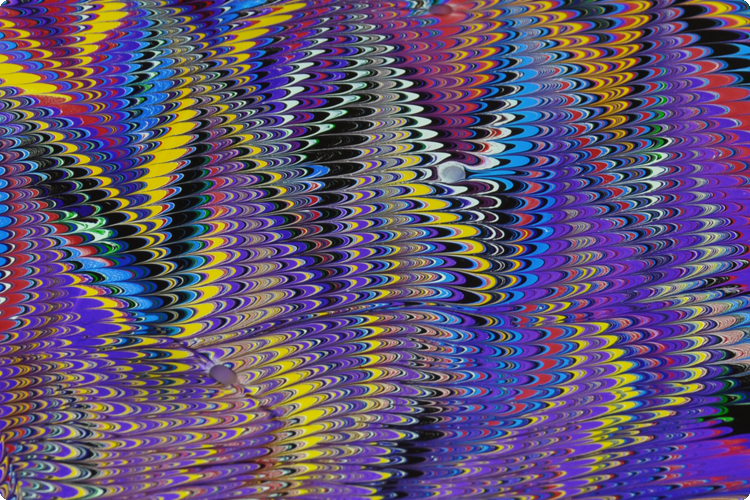
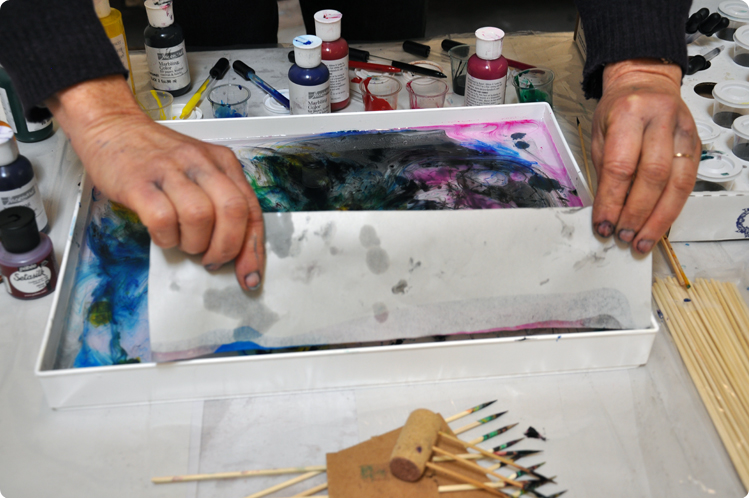
With all the desired colors of paint on the surface, use your rakes, combs or found items to carefully create swirls and design patterns.
Going back and forth with a toothpick or chopstick will produce chevron patterns, this is called a Gel-Git.

Using a skewer will allow you to manipulate specific areas of the design.
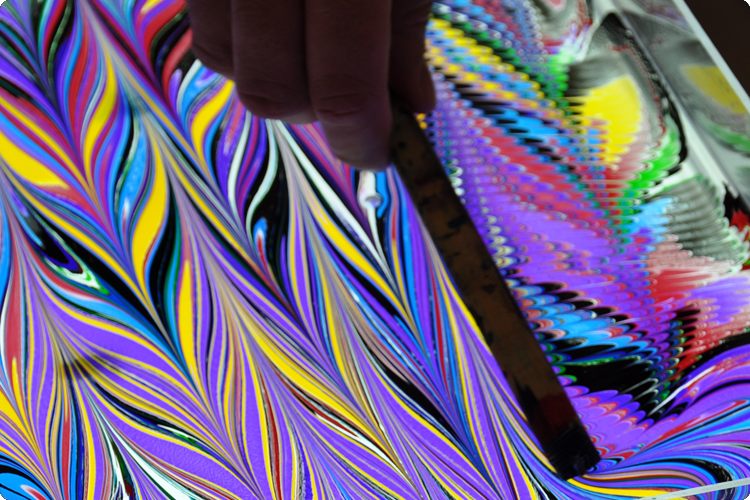
Using a comb in one-direction after the Gel-Git gives you the traditional non-pareil pattern that most think of with marbling.
Some other techniques to try-
Create "negative" areas in the design by placing soapy water or small droplets of Synthetic Gall on the surface with an eye dropper or by sprinkling it on. Use 1/8 teaspoon of liquid soap to 1/2 cup of water. Use this like a "clear paint" in your designs.
Dip a whisk or a bundle of broom straws in some paint and flick drops onto the surface.
Applying the paints to your fabric
Lay the middle of the fabric down first and let the ends roll out onto the surface so no air is trapped underneath. Leave the fabric down for 2-5 seconds before lifting it off. Try to "peel" the fabric off the surface so it doesn't fold onto itself.
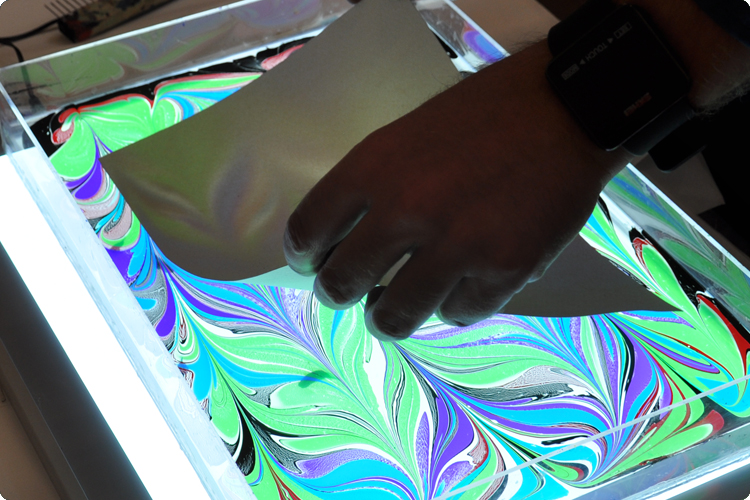
Dash to the sink or have a bucket handy and gently rinse with cold water to remove the alum and excess size. Now lay flat or hang to air dry. Don't wring or squeeze as the paint will not be 100% set until it has dried and been ironed.
When the item is completely dry, heat set according to the heat setting instructions for the brand of paints you are using.
If you are doing two-sided items like T-shirts, cut a piece of cardboard to size and cover with plastic or Saran wrap and insert into the shirt. Do one side, re-do the colors and then do the other side.
After each "printing" you can either add more paint or clear the surface with newspaper and start a new design.
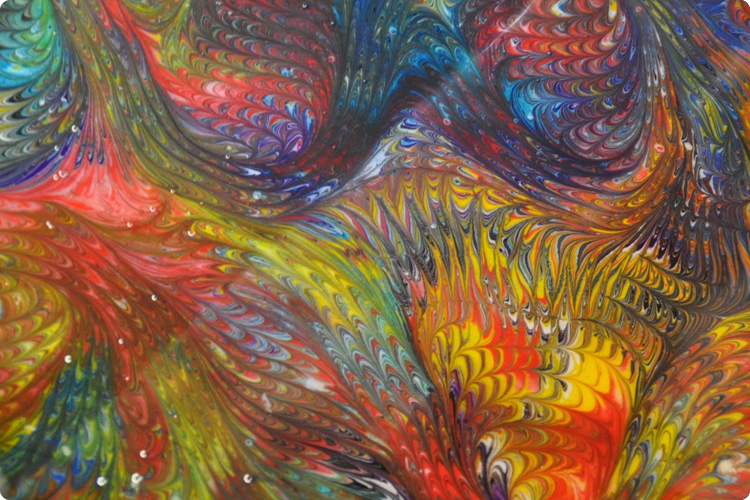
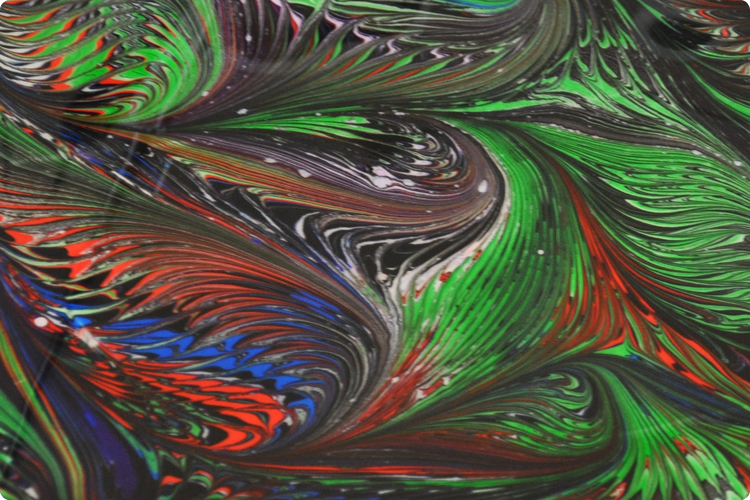
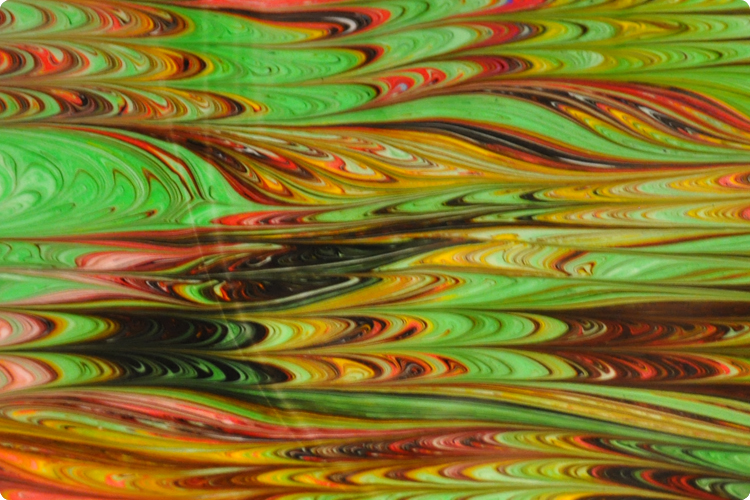
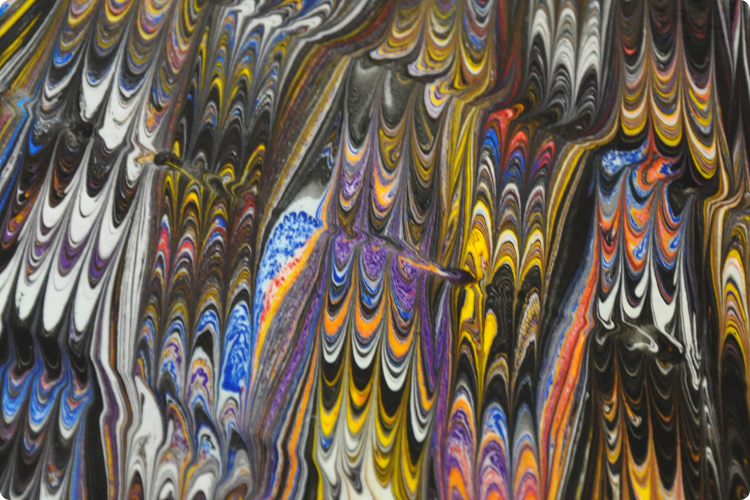
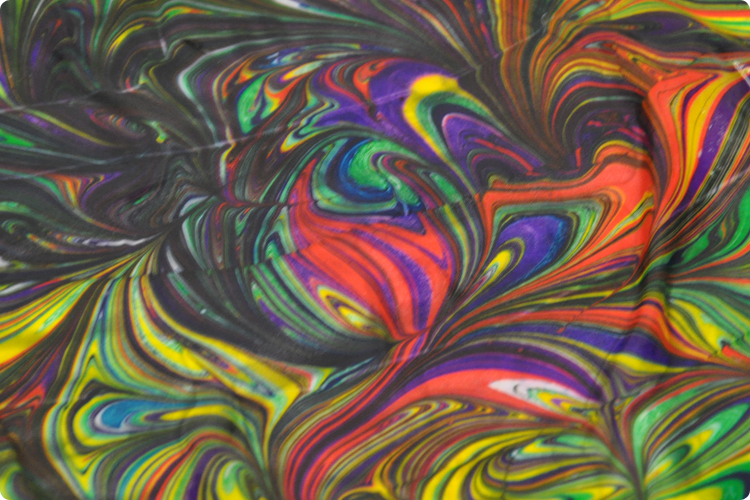
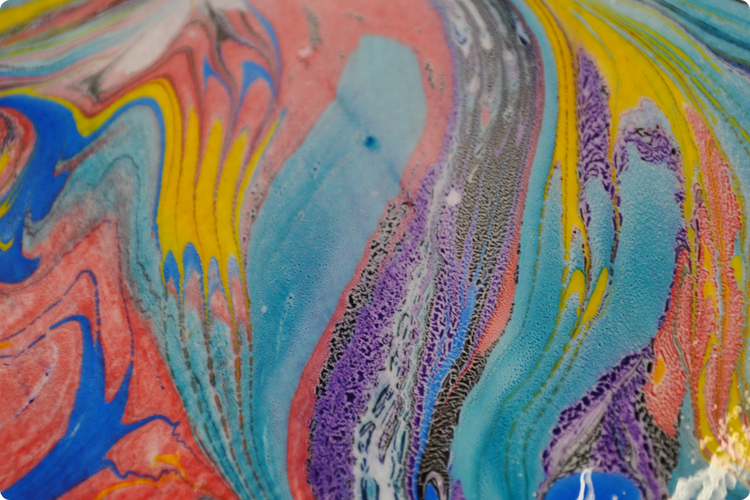
Other examples we did:
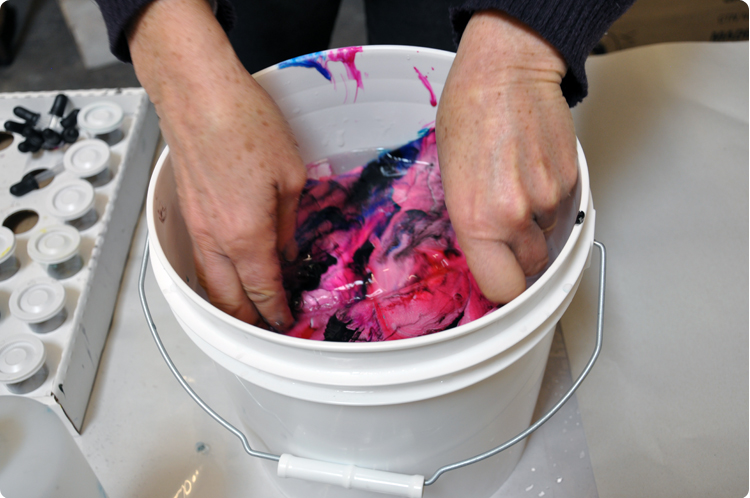
Cleaning Up
Skim the surface of the marbling base with a strip of newspaper. If you're planning to reuse it soon, cover the paint mixture with plastic wrap or airtight lids. The size is usually good for more than one session.
If you're not using your size again pour it down the toilet or run lots of hot water with it down the drain to avoid clogs.
Rinse the marbling tools in lukewarm water without soap. Soap residue on tools can contaminate future prints.
Rinse the tray thoroughly in a sink. Again, do not use soap.
Troubleshooting
The marbling paints sink to the bottom of the tray.
- The size might be too thin or old. Add 1 teaspoon of Methocel (Methocelulose) powder per gallon of solution, or throw out and start a new recipe.
- Marbling colors are too thick. Add water to thin the colors, skim the marbling base, then test. You may need to add detergent to the paints to improve its ability to spread and float.
The marbling colors spread too much or not at all.
- You might have added too much water or surfactant to the marbling color. Add more paint to balance it out.
- Size maybe too thick causing the drop to just sit on the surface. Add water to the size to thin it out. Skim, then re-apply marbling colors. Experiment with it to achieve the desired effect.
The marbled print appears fuzzy.
- The marbling base is too thick. Add water to the size, then re-apply paints.
- The marbling colors might be too thick. Thin the colors with water, then test.
- There was too much time spent between making the pattern and putting the fabric in the paint mixture. Work more quickly.
- The most frequent disaster is that the fabric falls apart at the end. It's from the Alum. Make sure you are not using more alum then recommended and use your fabric right away or wash it out.
- As you may have surmised by now, marbling can be a messy project, one which is best done with enough space to spread things out, and with lots of newspapers on hand. It's a great outdoor project when weather permits! However, the results are unique and spectacular!


